
If you have just created a new mail profile and notice certain data is missing like Contacts, Calendars, or Tasks you will likely need to manually export them from your previous mail profile and import them into the new one. This procedure walks you through doing so.
1. Open Outlook using the profile you wish to export data files from:
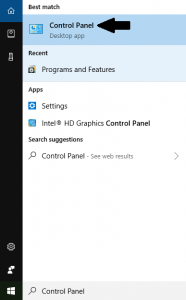
- Press the Start Menu button then search for “Control Panel”.
- Search “Mail” at the top-right of the Control Panel window and open “Mail”.

- Click the “Show Profiles…” button.

- Choose to either be prompted to select a mail profile upon opening Outlook. Or choose to automatically load a profile when Outlook opens.

2. Press the “File” button at the top-left of Outlook.

3. Press the “Open & Export” button then “Import/Export”.

4. Select “Export to a file” then click “Next >”.

5. Select “Outlook Data File (.pst)” then click “Next >”

6. Choose the item you wish to export and click “Next >”.
Note: You may only select one item (example “Calendar” not Calendar AND Contacts). If you need to export/import multiple items simply repeat this process. If you wish to include subfolders of an item, be sure to check “Include subfolders”.

7. Press “Browse…” to choose a location to save your data file then click “Finish”.
Note: It is advised to check “Do not export duplicate items” to prevent cluttering your mail profile with unneccessary items.

Note: After clicking finish you will be prompted with a window to set a password for the data file. You may set one if you wish, however to skip setting a password simply click “OK” without entering any information.
8. Open the Outlook profile you wish to import the data files into (See step 1). Then navigate from File to Import/Export again in Outlook.
9. Select “Import from another profram or file” then click “Next >”.

10. Select “Outlook Data File (.pst)” then click “Next >”.

11. Click “Browse…” to navigate to your saved data file.
Note: It is advised to check “Do not import duplicates” to prevent cluttering your mail profile with unneccessary items.

12. If you wish to include any subfolders for the item you are importing, be sure to check “Include subfolders”. You may also choose to where to import the data file (into the same folder is the default). Click “Finish” once configuration is completed.

Note: If you chose to set a password for the data file when it was exported, you will have to enter the password before importing.