
1. Log into https://bdr.magna5.com/
From the navigation pane, click Protect > Databases. The Instances page appears.
2. Click on SQL instance name containing the database that you want to restore.

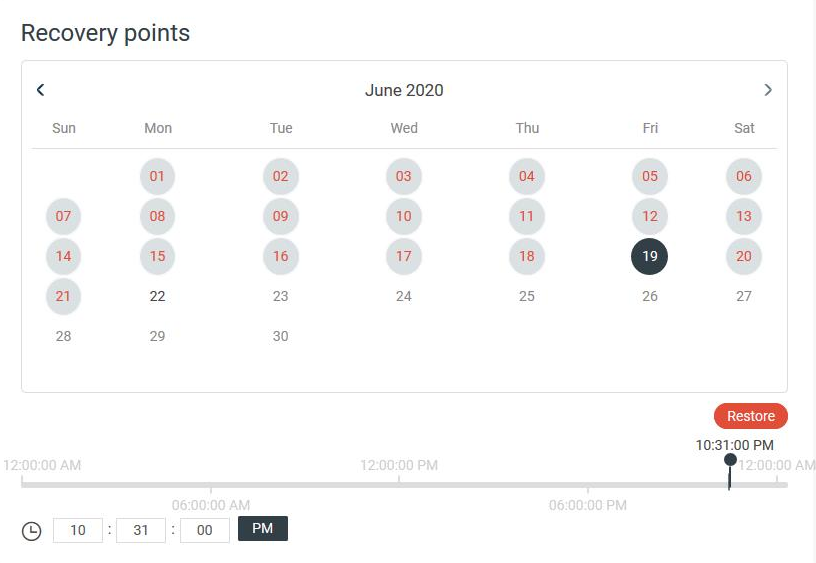
3. Under Recovery points, select a date that contains a backup. Then, enter a time at the bottom of the screen that you would like to recover the Database from on the selected date. Once Date and Time have been entered, click Restore.
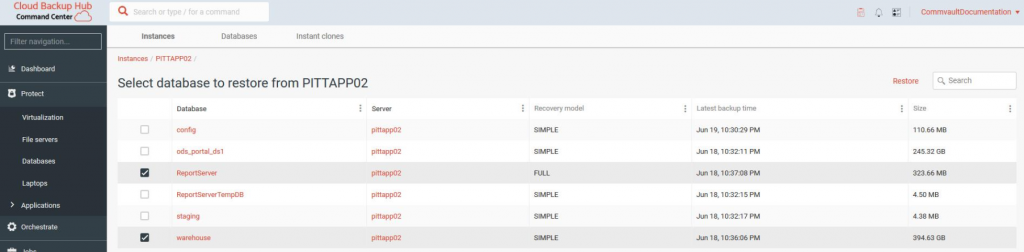
4. Select the box next to the Database(s) that need restored. Once the Database(s) are selected, click Restore in the top right of the screen to bring up the restore options.
5. Configuring Restore Type:
- In Place Restore will overwrite the existing Databases on the original Server and Instance.
- Out-of-Place Restore will create a new Database for the restore. The original server or different servers with a compatible version of SQL and a Commvault SQL Agent installed can be selected as the target destination.
- Restore to disk: Can be used for restoring Databases as “BAK” files to any server with an SQL Agent installed.
6. Restore Options: Depending on the restore type you wish to perform, please reference the desired type below.
In Place Restore: To Overwrite the existing Databases on the source server, leave the restore options page on the “In place” tab and no additional settings will need made. Once you click “Submit” in the bottom-right corner, the restore will Overwrite all Databases on the original location and instance with the ones selected to be restored.

Out-of-Place Restore: To Restore Databases with a Different Name, Different Database/Log File Locations, or to a Different SQL Server, go to the “Out of place” tab under the Restore options.
- Select the Desired Destination Server and SQL Instance from the dropdowns.
- Under “Data files” there will be 3 options for each Database. These will be for the Database name and File Locations and the MDF and LDF file names.
- First, select one of the Database names on the left of the screen and then type the new Database Name and the Folder Paths for the Data and Log files.

- Next, click on the 2 options below the Database name which have a ” – ” at the beginning. This is where you can rename the MDF or LDF files if needed and can verify how much free space will be required on the drive to restore each. The Physical Path should show the folder path that was entered on the option above for the “Data file path” and the “Log file path”.
- Database files are .MDF and log files are .LDF


- The following recovery options are available under the Additional options. By default, the Recovery option is selected.
- Recovery
- Restore a database and leace the destination database in an online state.
- No Recovery
- Restore a database and leave the destination database in a restoring state.
- Standby
- Restore a database and leave the destination database in a standby state which is read-only.
- Recovery
- Click Submit in the bottom-right corner to start the restore once all settings are verified.

Restore to disk (BAK File): To restore the Databases as BAK files, go to the “Restore to disk” tab under the Restore options and select the Destination server from the drop-down. Once the Destination Server is selected, Type or Browse to the folder on the server for the BAK files to be placed. Once both options are selected, click “Submit” in the bottom right corner to start the Restore.
