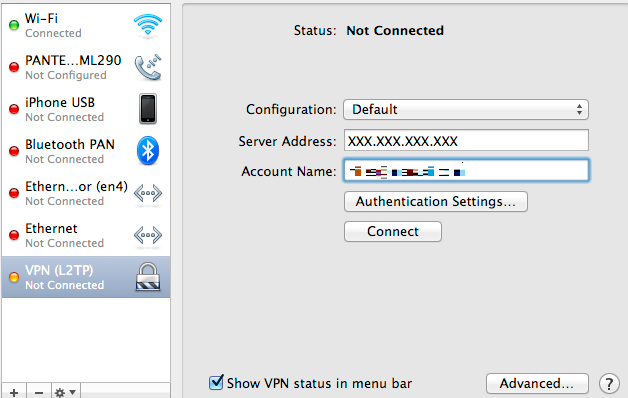
1. Open System Preferences -> Network from Mac applications menu. Click the “+” button to create a new service, then select VPN as the interface type, and choose L2TP over IPsec from the pull-down menu.
- Server Address: Enter the public IP address (found in the Dashboard, under Security appliance -> Monitor -> Appliance status -> Uplink)
- Account Name: Enter the account name of the user (based on active directory, RADIUS, or Meraki Hosted authentication)
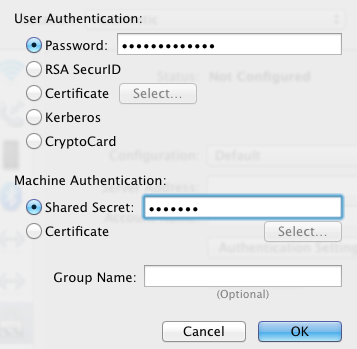
2. Click Authentication Settings and provide the following information:
- User Authentication -> Password: User password (based on Active Directory, RADIUS, or Meraki Hosted authentication)
- Machine Authentication -> Shared Secret: The preshared key that you’ve created in Configure -> Client VPN settings for the MX.
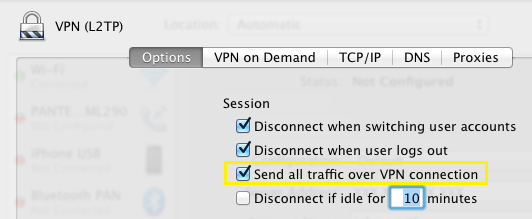
3. Click OK to go back to the main VPN settings page, then click Advanced and enable the Send all traffic over VPN connection option.