The Recovery Console is to be used when the source workstation is offline or not available.
1. Install the Recovery Console on the Workstation\Server that you want to restore too. The Recovery console Installation file can be found here.
Once you have installed the Recovery Console on the computer you are restoring to, you should see the following. (If it does not start automatically, please search for the “Recovery Console” application on the computer and open it.)
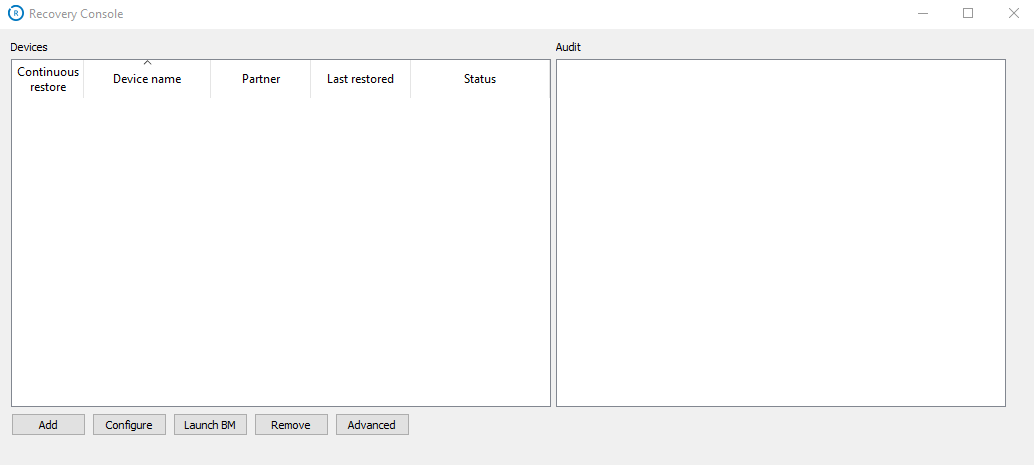
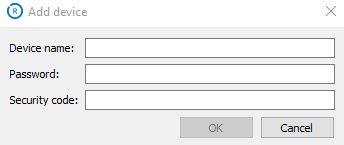
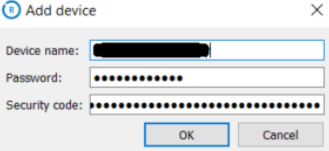
2. Click the “Add” button and you will be asked for the Devices name, Password and Security code.
Follow the steps below to obtain the Device name, Password and Security code:
A) Log into the Monitoring Portal. Instructions for Logging in can be found here.
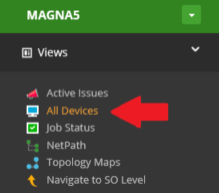
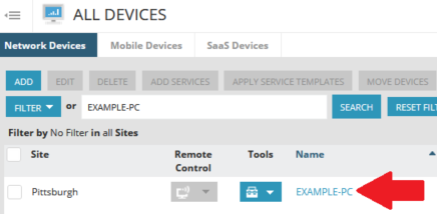
B) To get the Device name, Password and Security code, go to the “Views” drop down menu on the left side of the screen and click “All Devices”.
C) On the “All Devices” page, search for the computer you need to restore from. Once located, click on the Name on the Device.
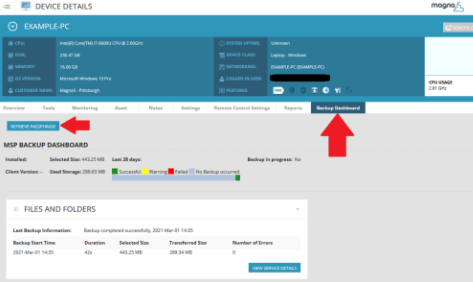
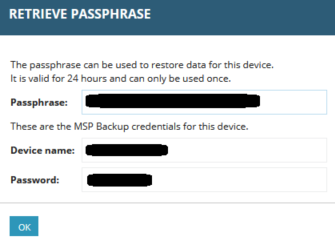
D) On the “Device Details” screen, click on the “Backup Dashboard” tab. Then, click on “RETRIEVE PASSPHRASE”. You will now be presented with the Device Name, Password and Passphrase\Security code.
E) Enter this information into the “Add device” prompt in the Recovery Console and click OK.
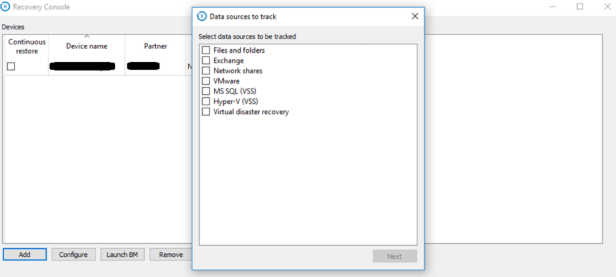
F) When the device is added you will receive a pop up for selecting Data sources to track. Close this dialog box and do not select any options.
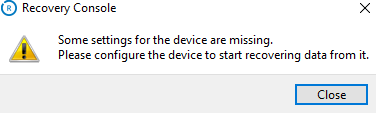
G) When closing the dialog box, you will receive a second message stating that some settings for the device are missing. Close this dialog box.
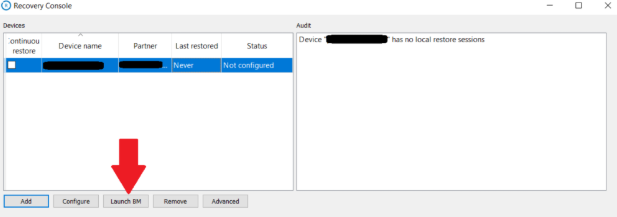
3. Now highlight the device by clicking on it and then press “Launch BM”. (DO NOT select the box on the left of the device for Continuous restore)
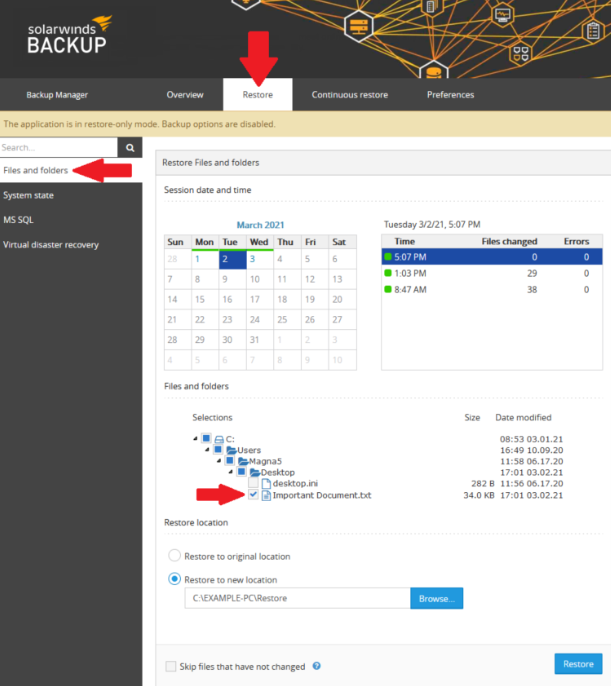
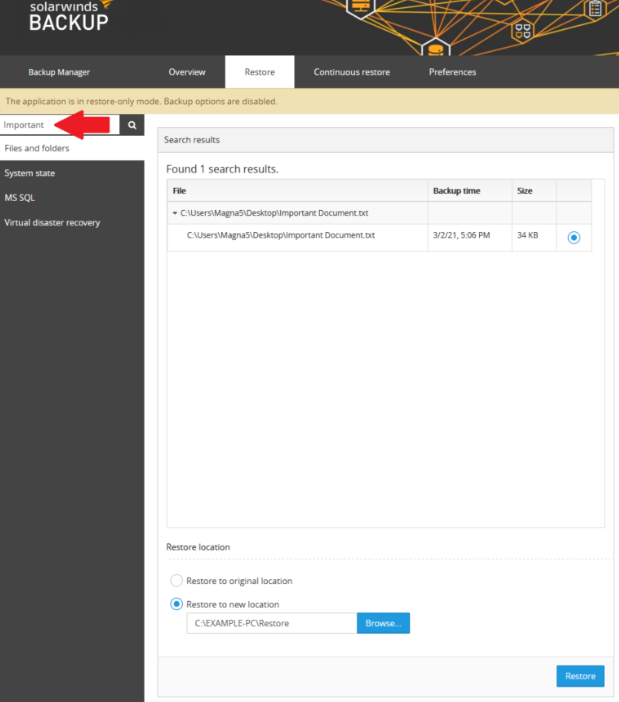
4. Once the webpage loads, click on the Restore tab.
a. First, select the Date you would like to restore from then choose from the available backup Times for the selected date.
b. Next, under files and folders select the files\folders that you need to restore.
- You will only be able to restore to the computer running the Recovery Console using this method. However, you can restore to a network location if the path does not require credentials.
- If different types of backups are available to restore from such as SQL, they will be available on the left side of the screen under the search box. Click on the backup type to choose what to restore.
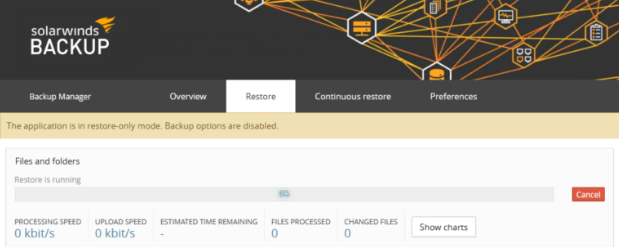
5. Once you click on Restore you should see a progress bar on the top of the screen such as the one below. Once the restore finishes, the items you selected will be in the restore location you specified in the previous step.
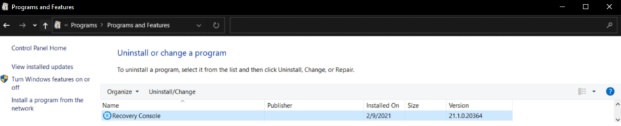
6. When you are finished restoring items from the PC, you can now remove the device from the Recovery Console by selecting the device, then clicking “Remove” and then “Yes”. You can also uninstall the Recovery Console through Control Panel if you no longer require it.
If you receive a message stating, (Restore client is still running for device “Device Name”. Do you want to forcefully stop it?) Please confirm that the restore Progress bar in Step 5 completed successfully then close the webpage. You can then click “Yes” to finish removing the device from the Recovery Console.